What a hectic couple of weeks!

Well the last 2 weekends have been interesting, last week Aimee’s mother got married, she looked very lovely! 

We made a cake for the occasion, it was no where near as amazing as the actual wedding cake, which can only be described as a masterpiece! However the kids who weren’t keen on the fruitcake (and not allowed to touch the top tier) it did the job.

Natalie (Aimee’s mother) had commissioned a custom cake from her friend Nicci Park at Noodle Doodle Cakes  and it was incredible!

Whilst we were up north, a little impromptu cake baking happened with Aimee’s brother (Xavi) He was ACE! For 10 years old he totally got baking and we think he may become a featured baker on here every now and then!

However this sunday has been a little slow, we have been baking throughout the week but no photo recipes today, thats why we thought we’d give you a little insight into what we’ve been up to! Promise we’ll be back with a BANG next weekend!

xx

SSB

Sunshine Shortbread

So as you all know the sun has been out in force this week. If you any thing like us you wish that you could take the sunshine everywhere well now you can with theses little pieces of sunshine. They sure will brighten up your Monday blues.

20120329-091141.jpg

20120329-091315.jpg

20120329-133916.jpg
What you will need.
Shortbread Mix
200g Plain flour
100g Icing Sugar
125g Unsalted butter

Icing
50g Icing sugar
A few drops of food colouring
A few drops of lemon juice
A few drops of water

Filling
100g icing sugar
50g lemon curd
75g clotted cream

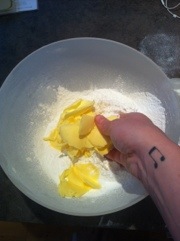
Right let’s get started. Preheat oven to 150C, gas mark 2. Put the flour, icing sugar and butter into a bowl and work together with your hands.

20120329-211913.jpg
Now it does take a bit of time but it will come together to form a smooth ball like this.
We work ours for around 20 minutes.

20120329-212321.jpg
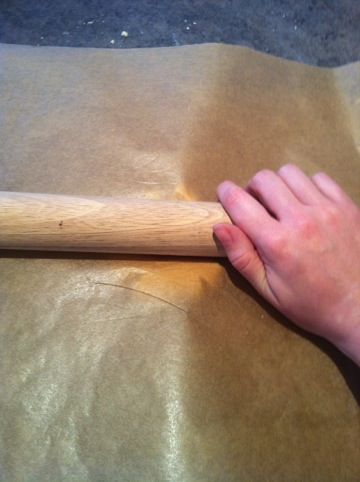
Now lightly flour your work surface and roll out the dough to 0.5 cm thick. You may find the dough very crumbly, so here is a little tip for you roll the dough between 2 large sheets of grease proof paper we did it this way.

20120331-142632.jpg
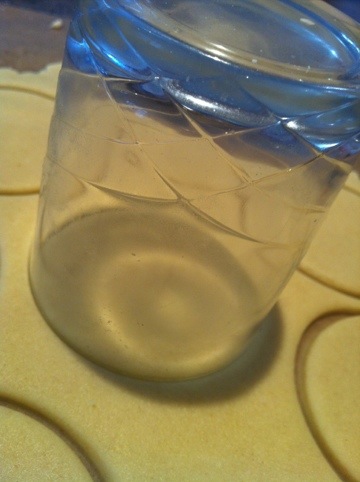
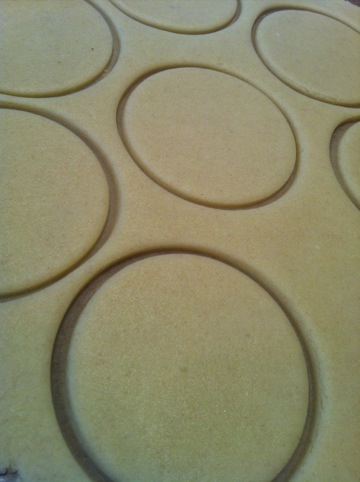
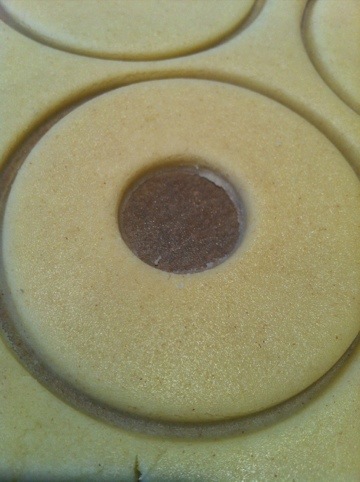
Once your dough is rolled out you can start cutting out your biscuits. You can use a biscuit cutter or if your like us and don’t own a biscuit cutter use a small glass to cut out the biscuits. (you want the biscuits to be roughly 5cm you wanna cut out 28 rounds)

20120331-143336.jpg

20120331-143423.jpg
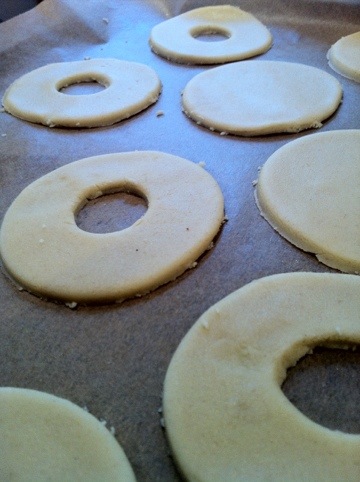
Now you want to cut out a 1cm hole in half the biscuits again us a biscuit cutter if you have one if not us what you have to hand. (We used the one of the nozzles of the piping bag)

20120331-144033.jpg
Then carefully transfer to baking tray lined with baking parchment. Bake for 25 minutes until barely golden at the edges. .

20120331-144323.jpg
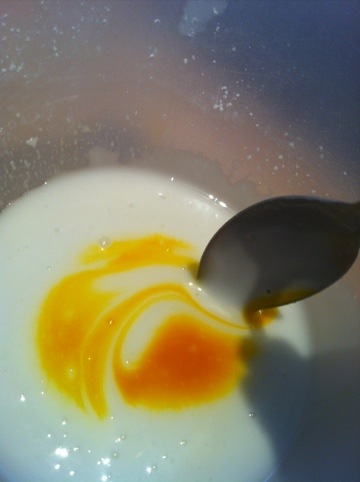
Once cooked transfer to a wire rack and to cool. Now on to the icing add the icing, cold water and food colouring to a bowel and mix till it is soft enough to drizzle.

20120331-144834.jpg
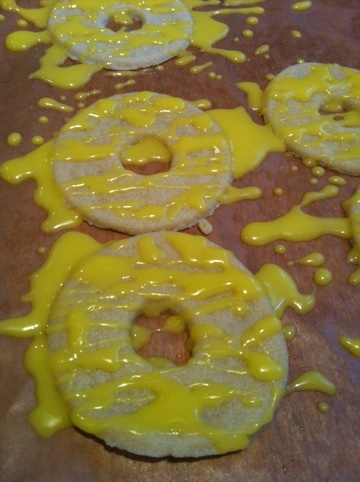
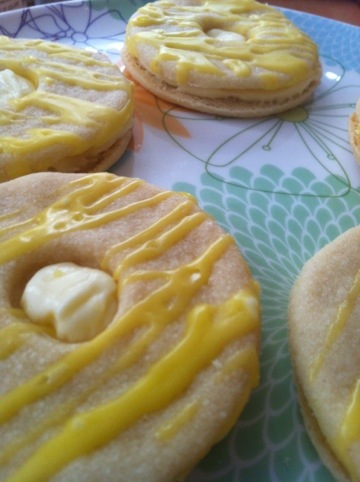
Now to do some drizzle action. Place the biscuits with the holes in on to a wire rack with a baking tray under, so the excess icing can drip away. Us a teaspoon to drizzle.

20120331-145254.jpg
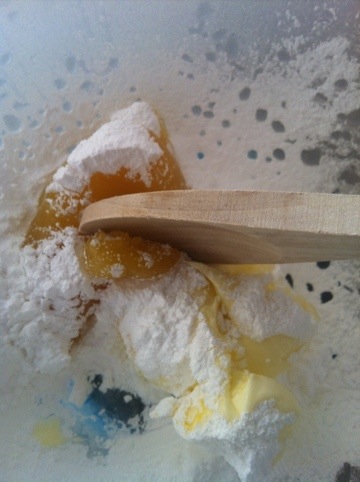
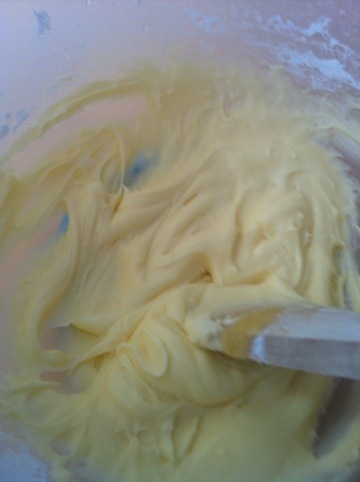
For the filling, beat the icing sugar, half the lemon curd and then the yummy yummy clotted cream until thick. Spread over the reaming biscuits.

20120331-145617.jpg

20120331-145716.jpg

20120331-145755.jpg
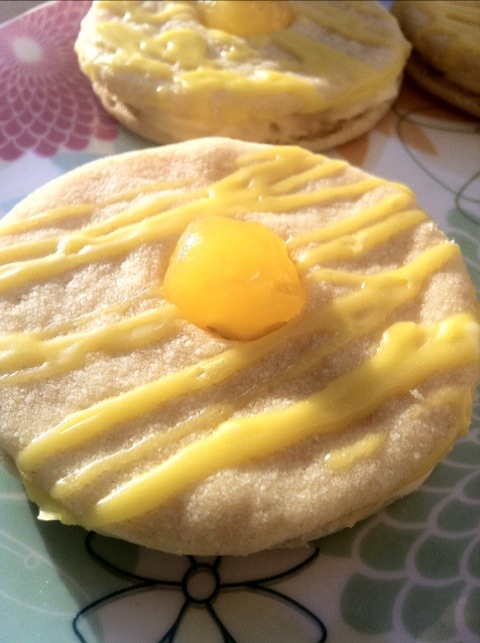
Then to finish of these bits of sunshine with the remaining lemon curd add 1/4 tsp of the curd in the centre of the biscuit where the hole is then you home made sunshine is done and dusted.

20120331-150316.jpg

Apologies & The Don Draper..

Soooo last week…We didn’t post a thing! Even though we said we would; we did bake, we made delicious St.Patrick’s day cakes which were topped off with little shamrocks and green hats (they were very good) but by the time we came to post, the magic of the day had worn off..

Today we are back with a BANG!

As many of you are probably aware Jon Hamm is a very, very, attractive man and today marks the season premier of Mad Men season 5 (in the USA) however, we love the series so much we decided to dedicate our sunday bake to Mr Don Draper.

Image

We’ve combined his favourite drink and our favourite past-time to create an old fashioned inspired cup cake; a whiskey filled sponge with a butter icing full of Angostura, lemon and sugar!

Equipment list:

  • 12 cupcake cases
  • 12 holed cupcake tin
  • 2 mixing bowls
  • Electric Whisk
  • Wooden spoons
  • Weighing Scales
  • Piping Bag
  • Large Star Nozzle

Cupcakes:

  • 100g (4oz) Softened Butter
  • 150g (5oz) Self-raising Flour
  • 150g (5oz) Caster sugar
  • 2 Large Free range eggs
Icing:
  • 250g (8.8oz) Butter
  • 250g (8.8oz) Icing Sugar
  • Angostura Bitters (as much as you like)
  • Yellow Food Colouring
Decoration:
  • Lemon Zest (finely grated)
  • Granulated suger ( a sprinkle)

Cupcakes aren’t hard to bake, so put your apron on and preheat the oven to about 180ºC. A great thing with this humble mini cake is that you can be a little rough with it, once you have weighed and measured your ingredients pop them all in a bowl and let the whisk do the talking!

Image

Don Draper’s whiskey of choice is Canadian Club, but there are so many good whiskeys on this beautiful Isle; we’ve plumped for a blended 12 year Chivas regal. We also didn’t measure how much we poured in…Oooops!

Once you’ve whisked your mixture up, pop it in your baking cases.

Bake for around 20 minutes, until golden brown.

For the Buttercream icing, mix your butter and icing sugar together, I added a tiny bit of yellow food colouring to give it the illusion of lemon (although it does have the lemon zest on top)

Adding a fair few shakes of Angostura to the icing, until it’s bitter taste just hinted through the sweetness of the buttercream icing, To be honest there was a moment when this could have gone badly as Angostura has a unique taste, however the icing is delicious!

Using the same star shaped nozzle as our last cupcakes use big swirls of icing, remember these are DD cupcakes, only the best for Don!

We then grated a little bit of Lemon zest on top and added a sprinkle of sugar!

The perfect accompaniment at 4 o’clock in the afternoon or 11 o’clock in the morning…

Twitter!

We have twitter! @stinkybakers Give us a little tweet!

Spiced Toffee Apple Cupcake

We are hunggggg overrrrr! Last night is a blur, not sure what time we got in, but today has been horrendous.. Luckily a stroll in the beautiful sunshine has cured us! We are now enjoying the day rather than wishing it away!

Worcester Cathedral

So today’s treat is a throw back to bonfire night, or at least we think it is; Spiced Toffee Apple cupcakes hardly shout spring but we think these are a hit no matter what season it is!

We’ve made this recipe as simple as possible, mainly because we are being a bit lazy but also to show that baking doesn’t have to be tedious!

Equipment list:

  • 12 cupcake cases
  • 12 holed cupcake tin
  • 2 mixing bowls
  • Electric Whisk
  • Wooden spoons
  • Weighing Scales
  • 1 frying pan
  • 1 medium-sized pan
  • 1 Ramekin
  • Piping Bag
  • Large Star Nozzle

Ingredients:

Cupcakes:

  • 100g (4oz) Softened Butter
  • 150g (5oz) Self-raising Flour
  • 150g (5oz) Caster sugar
  • 2 Large Free range eggs
  • 1/2 teaspoon of ground Cinnamon
  • 1/2 teaspoon of ground Ginger
  • 1/4 teaspoon of ground Clove
  • 1/2 teaspoon of ground Nutmeg
  • 1/4 teaspoon of ground Caraway seed
Icing: (which includes making caramel)
  • 250g (8.8oz) Butter
  • 250g (8.8oz) Icing Sugar
  • 100g (3 1/2oz) Sugar
  • 100ml (3 1/2floz) Double Cream
Decoration:
  • 3 Apples (we’ve used Cox’s)
  • 100g (3 1/2 oz) Sugar
  • handful of Ice cubes

So preheat the oven at about 180ºC and put all the cupcake ingredients into a bowl and use the electric whisk until the mix is smooth and fluffy.

Then divide your cupcake batter into the 12 cases, pop in the oven for 20-25 minutes, if you are unsure whether the mix is ready stick a knife in the mixture, if it comes out clean you’re ready!

(This mix is very, very easy and takes little time to prepare and make, perfect if you’re in a rush or experiencing the after effects of alcohol consumption.)

The buttercream icing is equally as easy, sift your icing sugar into your softened butter and mix until the two ingredients are binded, then pop in the fridge until you need it!

The caramel needs a bit more close attention, We sprinkled the sugar evenly in a pan and then cooked over a medium high heat for about 4/5 minutes until the sugar had caramelised, we then added the double cream and stirred quickly, you may find lumps form, this is due to the cold cream and hot sugar mixing, just heat the mixture up a little more, just try not to burn it.

After you have successfully made your caramel pour into a ramekin and leave to cool. Once your caramel is cool, add it to the buttercream and then mix the two together until the mixture is smooth and pliable.

The apples use the same process but without the double cream, so again heat up the sugar, we used a large frying pan for this, so the apples wouldn’t stick together! (sugar can get very, very sticky) once the sugar has melted add the apples; we cut ours horizontally so we had this rather cute looking star shape! Keep cooking until the apples caramelise and turn a gorgeous golden brown.                                                                                                                                                                                                         In a bowl add Ice cubes and water, once the apples are done throw them into the water; this helps them crisp up and stop them from going sticky! Fish them out after 5 minutes and place somewhere safe!

Bringing the cupcakes together!

Ice the cupcakes with the Caramel Buttercream icing, we used a large star piping nozzle. Pop a slice of caramelised apple, et voilà; Spiced Toffee Apple cupcake!

Dreamy Finger Cake

We decided to throw a house roast today, taking inspiration from the lovely Alice Harold’s recipe substituting shoulder for leg and making additions and subtractions here and there..

After finishing the colossal meal we moved on to pudding; A Dreamy Finger Cake, which houses more calories in one slice than you’re allowed in a week, however this let us slump into the obligatory sunday food coma, which has set us up for the week ahead!

We created a step by step photo guide on how to make our bloody lovely cake!

Equipment list:

  • 2 x 20cm (8″) deep sandwich tins
  • 1 electric whisk
  • Sieve
  • Weighing scales
  • Baking parchment
  • Mixing bowls
  • Wooden spoons
  • Measuring Jug
  • Pallet knife

Ingredients:

Cake:

  • 50g (2 oz) sifted coco powder
  • 6 tablespoons of boiling water
  • 3 large (free range) eggs
  • 50ml (20 fl oz) Milk
  • 175g (6 oz) self-raising flour
  • 1 level teaspoon of Baking Powder
  • 100g (4 oz) softened Butter
  • 275g (10 oz) Caster Sugar

Icing:

  • 200g (6.3 oz) White Chocolate (cooking quality)
  • 30g (1.8 oz) Softened butter
  • 15ml Milk
  • 1/2 teaspoon Vanilla Extract
  • 125g (4.5 oz) Icing Sugar
  • 6 tablespoons Double Cream
Decoration:
  • Rasberries
  • Blueberries
  • Cadbury White Chocolate fingers

Preheat Oven to: 180c/160c (for fan assisted) Gas Mark 4.

Grease the two sandwich tins and line the base with baking parchment cut into circles..

Once you have sifted your coco powder, blend with boiling water in your large bowl until it forms a paste..

Then add the remaining cake ingredients until the mixture is smooth and thick..

Divide the cake mix evenly between your two tins..

Then pop them in the oven..After forgetting to set a timer, we agreed that they had probably been in for 5 minutes and needed another 25 mins, however there was a little abuse thrown around in regards to whether they were ready or not, after agreeing to meet half way we left them in for about 2 minutes more taking baking time to roughly 32 minutes, basically stick your finger in, if it bounces back they’re ready, also this mix is a fudge cake so a bit of moisture within the cake is allowed!

Whilst waiting to bake, have yourself a well deserved cup of tea (or stronger)  Once ready leave the cakes to cool in their tins, then remove and peel the baking parchment off..

Now for the Icing…

We forgot to take more pictures of this process but it is a simple one; beating together milk, butter and vanilla extract slowly add the icing sugar until smooth, Melt the white chocolate, once it has cooled down a bit chuck it in with the rest of the beaten together ingredients, then add your double cream.

We iced one half of the cake, sticking it in the fridge for 5 minutes to set and then covered it in delicious berries this would form the sandwich filling once the other  half was popped on top! Covering the final product in icing (you can use a palette knife for this) we then stuck the fingers on the side to form a chocolatey fence so the remaining berries we popped on the top of the cake couldn’t escape!

And here it is finished in all it’s glory..

Fin!

WE ARE STINKY SUNDAY BAKERS

We are Aimée-louise Nunan & Nicola Ann Millard and every Sunday we bake, come rain, shine, hangover, whatever, we will bake!

By day we save the world, no really, we do…. by night we mostly abuse each other (hence the stinky reference) and occasionally we are civil, however like ebony and ivory we are joined together in harmony by our love of baking and eating the plentiful bounty we produce..

Follow our cake making escapades and we hope you enjoy…